
If you use a Mac for work, content creation, or online classes, screen recording is a basic skill you need. Whether you want to record a tutorial, save a Zoom meeting, or capture a software demo, macOS already gives you built-in tools to do it. But many users in the United States still struggle to find the right method.

Problem: Screen Recording on Mac Feels Confusing
Many Mac users think screen recording requires expensive software. They search online, download random apps, and end up wasting time.
Common problems include:
-
Not knowing the keyboard shortcut
-
Recording without sound
-
Low video quality
-
Huge file size
-
App compatibility issues
If you run a YouTube channel, teach online classes, or create product demos, this confusion slows down your work.
Agitation: Why This Problem Matters
Imagine this situation.
You need to record a client demo or training video. You press random buttons, but nothing works. Or you record a 20-minute video and realize there is no audio.
Now you must record again.
This wastes time and reduces productivity. In the United States, where remote work is common, screen recording is part of daily tasks. According to data from Statista, over 35% of U.S. employees work remotely at least part-time. Screen recording is often needed for meetings, support tutorials, and documentation.
So learning the correct method matters.
Solution: How to Screen Record on Mac (3 Easy Methods)
Mac computers running macOS Mojave (10.14) or later have built-in tools. You don’t need extra software.
Let’s go step-by-step.
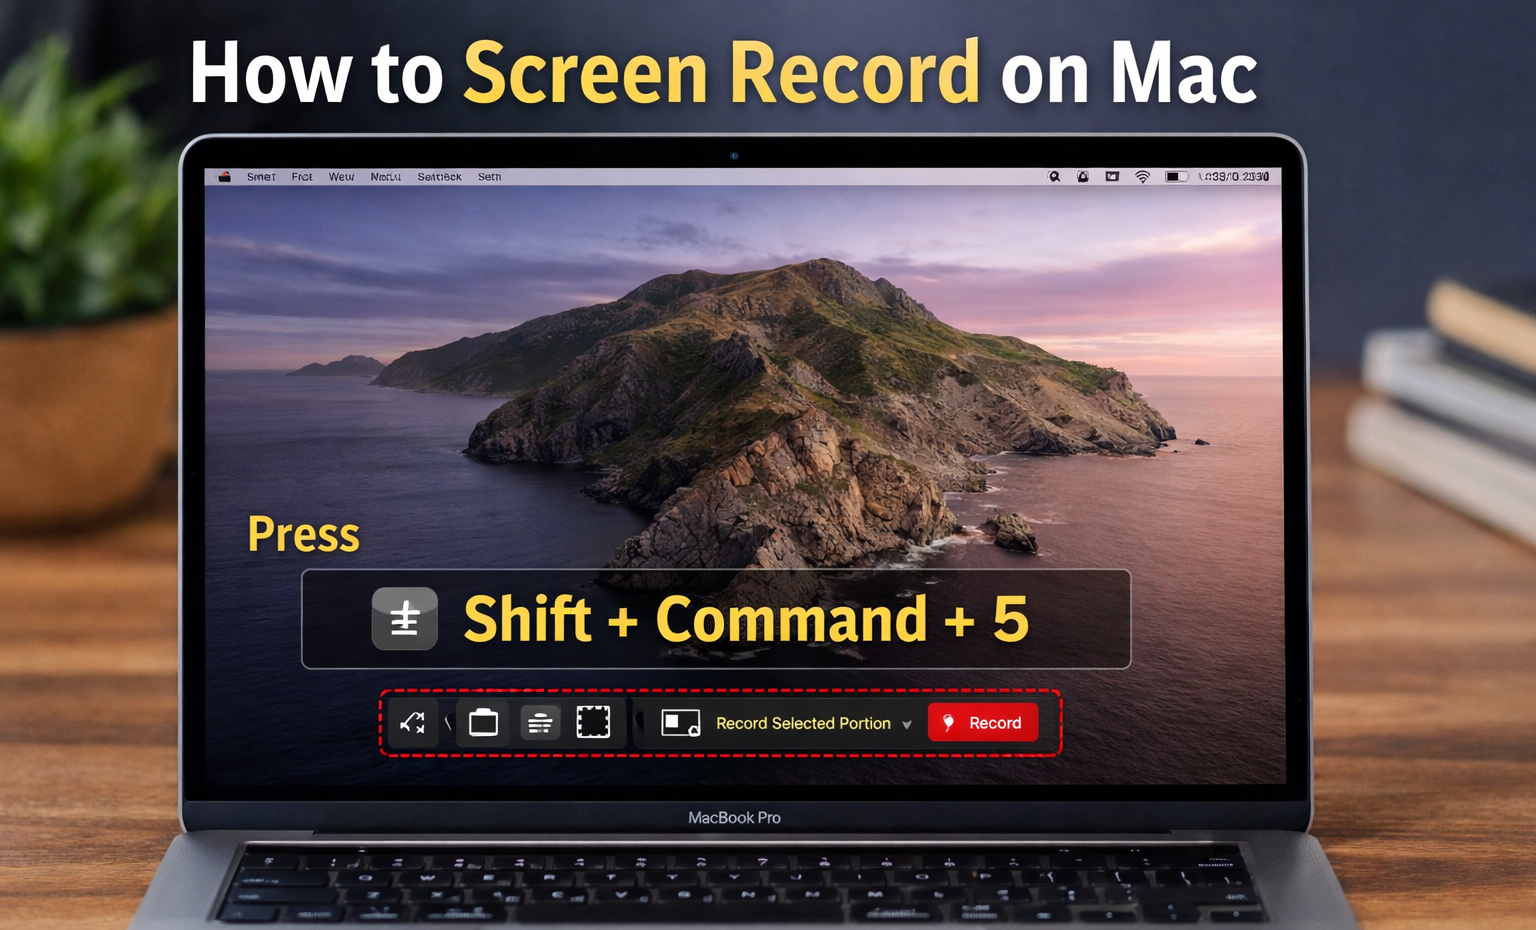
Method 1: Use Screenshot Toolbar (Best for Most Users)
This is the easiest method.
Step-by-Step Guide
-
Press Shift + Command + 5
-
A toolbar appears at the bottom.
-
Choose:
-
Record Entire Screen
-
Record Selected Portion
-
-
Click Options to choose:
-
Microphone
-
Save location
-
Timer
-
-
Click Record
To stop recording, click the stop button in the top menu bar.
File Format
Mac saves recordings as .MOV files using H.264 video codec.
Pros
-
Built into macOS
-
No extra software
-
High quality recording
-
Simple controls
Cons
-
Limited editing tools
-
Large file size if recording long videos
Method 2: Use QuickTime Player
QuickTime Player is another built-in app that supports screen recording.
Steps
-
Open QuickTime Player
-
Click File → New Screen Recording
-
Choose microphone if needed
-
Click Record
You can record the entire screen or drag to record a specific area.
Pros
-
Works on older macOS versions
-
Allows basic trimming
-
Reliable audio recording
Cons
-
Interface is not modern
-
No advanced editing
Method 3: Use Third-Party Apps (Advanced Users)
If you need professional videos, use tools like:
-
OBS Studio
-
Camtasia
-
ScreenFlow
These apps allow webcam recording, overlays, captions, and streaming.
Pros
-
Multi-camera recording
-
Live streaming
-
Editing tools
-
Better audio control
Cons
-
Learning curve
-
Paid apps can cost $150+
-
Higher CPU usage

How to Record Audio with Screen Recording
Many users forget this step.
Record Microphone Audio
-
Press Shift + Command + 5
-
Click Options
-
Select Built-in Microphone or External Mic
Record System Audio
macOS does not allow system audio recording directly. You need extra tools like BlackHole or Loopback.
For most tutorials, microphone audio is enough.
How to Improve Recording Quality
Follow these tips:
1. Close Background Apps
This saves CPU power and avoids lag.
2. Use External Microphone
USB microphones give clearer sound than laptop mics.
3. Record at 1080p
Mac records at screen resolution. If your display is 4K, file size will be large. Resize later.
4. Use SSD Storage
Recording long videos needs fast storage.
How to Reduce File Size
Screen recordings can be big.
Example: 10-minute 1080p video ≈ 1GB.
Use these methods:
-
Compress video using HandBrake
-
Lower resolution to 720p
-
Trim unwanted parts
Best Uses of Screen Recording
Mac screen recording is useful for:
-
Online teaching
-
YouTube tutorials
-
Software demos
-
Customer support guides
-
Recording meetings
-
Game recording
Many companies in the United States use screen recordings for training. It saves time compared to live sessions.
Final Thoughts
Screen recording on Mac is simple once you know the right steps. You don’t need extra software for basic videos. Built-in tools like Shift + Command + 5 and QuickTime Player work well for most users.
If you need advanced editing, OBS Studio or Camtasia can help.
Start with small recordings today. Practice with short videos. In a few tries, you will record tutorials, demos, and training videos without stress.
Screen recording is a practical skill for remote work, education, and content creation in the United States. Learn it once, and it will save hours every week.
FAQ: Screen Recording on Mac
1. How do I screen record on Mac with sound?
To record with sound, press Shift + Command + 5, click Options, and choose a microphone.
Mac allows microphone audio by default, but system audio needs extra tools like BlackHole or Loopback.
2. Where do screen recordings save on Mac?
By default, recordings save on your Desktop.
You can change this by clicking Options → Save To in the recording toolbar.
3. How long can I screen record on Mac?
There is no fixed limit. Recording depends on storage space.
Example:
-
10-minute 1080p recording ≈ 1 GB
If your Mac has enough storage, you can record for hours.
4. Can I screen record on Mac without installing apps?
Yes. macOS has built-in tools:
-
Screenshot Toolbar (Shift + Command + 5)
-
QuickTime Player
No extra downloads are needed.
5. How do I stop screen recording on Mac?
Click the Stop Recording button in the top menu bar.
Or press Command + Control + Esc.
6. Why is my screen recording not recording audio?
Common reasons include:
-
Microphone not selected
-
App permission not given
Go to System Settings → Privacy & Security → Microphone and allow access.
7. How do I record a specific window instead of full screen?
Press Shift + Command + 5, choose Record Selected Portion, and drag the area.
This keeps file size smaller and focuses on your content.
8. Can I edit screen recordings on Mac?
Yes. You can trim videos using QuickTime Player.
For advanced editing, apps like OBS Studio or Camtasia allow captions, zoom effects, and transitions.
9. Does screen recording slow down my Mac?
It can if your Mac has low RAM or many apps open.
Close background apps before recording for smoother performance.
10. Is screen recording legal in the United States?
Recording your own screen is legal.
But recording meetings or calls may require consent depending on state laws. Always inform participants before recording.
11. How do I reduce screen recording file size?
You can:
-
Record smaller screen area
-
Compress using HandBrake
-
Convert to MP4 format
This helps when uploading to YouTube or sharing with clients.
12. Why is my screen recording blurry?
Blurry recordings happen when scaling a 4K screen to low resolution.
Record at native resolution or export at 1080p
")
")

